
Most coffee enthusiasts own decent gear but still can’t pin down why their cup falls short of the café version they love. The gap rarely comes down to expensive machines. These premium coffee tips target the specific decisions that shape flavor: bean freshness, grind consistency, water chemistry, and brewing precision. Follow this guide and you will start tasting what your beans were actually meant to deliver.
Table of Contents
- Key takeaways
- 1. Start with the right premium coffee tips: buy fresh beans
- 2. Upgrade your grinder before anything else
- 3. Understand water quality and temperature
- 4. Use a consistent coffee-to-water ratio
- 5. Master the bloom for better extraction
- 6. Learn your roast levels and what they demand
- 7. Compare brewing methods and pick one to master
- 8. Troubleshoot flavor by changing one variable at a time
- 9. Develop your palate with coffee tasting
- 10. Source ethically and understand what you are buying
- My honest take on brewing premium coffee at home
- Explore premium blends worth brewing right
- FAQ
Key takeaways
| Point | Details |
|---|---|
| Freshness drives flavor | Use beans within 2 to 3 weeks of the roast date for peak complexity and aroma. |
| Grinder beats brewer | A quality burr grinder improves extraction more than upgrading your coffee machine. |
| Water quality matters | Filtered water with balanced mineral content is the single most overlooked variable. |
| Brew by weight, not scoops | A 1:16 coffee-to-water ratio by weight gives you a reliable, repeatable starting point. |
| Change one variable at a time | Isolating grind, temperature, or ratio lets you fix flavor problems without guesswork. |
1. Start with the right premium coffee tips: buy fresh beans
The flavor of any cup starts with the bean. Freshness peaks within 2 to 3 weeks post-roast, after which aromatic compounds fade and complexity flattens noticeably. Always check the roast date on the bag. A bag labeled “best by 12 months from now” tells you nothing useful. A roast date of two weeks ago tells you everything.
Single-origin coffees give you a cleaner flavor signal for learning. You taste the farm, the altitude, the processing method. Blends trade some of that clarity for consistency across seasons, which is fine for daily drinking but less useful when you are trying to refine your palate. Start with single-origin beans to discover flavor profiles and origins before committing to a house blend.
Storage matters as much as purchase timing. Keep beans in an airtight, opaque container away from heat and light. Avoid the freezer unless you are storing a larger supply you won’t open for weeks.
- Buy from roasters that print the roast date, not just an expiration date
- Avoid bulk bins where beans sit exposed to air for unknown periods
- Buy smaller quantities more frequently rather than stockpiling
Pro Tip: Order from small-batch roasters who ship within days of roasting. The difference between two-week-old beans and two-month-old beans is not subtle.
2. Upgrade your grinder before anything else
This is the single highest-impact equipment decision you can make. Burr grinders produce uniform particle sizes that extract evenly, giving you a balanced cup. Blade grinders chop unevenly, leaving you with a mix of fine powder and chunky fragments that extract at different rates. The result is a cup that tastes bitter in some sips and sour in others, sometimes within the same mug.
Expensive coffee machines often reflect design and convenience features rather than extraction quality. A $60 burr grinder paired with a basic brewer will outperform a $400 machine paired with a blade grinder.
| Grinder type | Grind consistency | Price range | Best for |
|---|---|---|---|
| Blade grinder | Poor | $10 to $30 | Not recommended |
| Manual burr | Good to excellent | $40 to $120 | Travel, pour-over, budget |
| Electric burr entry | Good | $80 to $200 | Everyday home brewing |
| Electric burr mid-range | Excellent | $200 to $500 | Espresso and pour-over precision |
Manual burr grinders like the KINGrinder K6 can deliver grind consistency that rivals entry-level electric models, with the tradeoff being physical effort per brew. For pour-over or French press, that effort is minimal. For espresso volume, you will want an electric option.
- Match grind size to your brew method: coarse for French press, medium for drip, fine for espresso
- Adjust grind finer if your coffee tastes sour, coarser if it tastes bitter
- Clean your burrs monthly to prevent rancid oil buildup
Pro Tip: Before spending on a new brewer, spend half that amount on a better grinder. You will taste the difference immediately.
3. Understand water quality and temperature
Water makes up roughly 98% of your cup, yet most home brewers give it zero thought. Distilled water produces flat, lifeless coffee because minerals are what allow water to carry flavor compounds from the grounds into your cup. Heavily chlorinated tap water introduces off-flavors that no brewing technique can compensate for.
The Specialty Coffee Association recommends water with 75 to 250 ppm TDS and alkalinity between 40 and 70 ppm for optimal extraction. Most filtered tap water or quality spring water falls into this range without any additional treatment.
| Water type | TDS range | Effect on coffee |
|---|---|---|
| Distilled | 0 ppm | Flat, under-extracted, lifeless |
| Lightly filtered tap | 50 to 150 ppm | Good, especially for pour-over |
| Balanced mineral water | 100 to 250 ppm | Excellent extraction and clarity |
| Hard tap water | 300+ ppm | Bitter, chalky, dulls sweetness |
Temperature is equally precise. Brewing between 195°F and 205°F extracts the right balance of acids, sweetness, and body. Boiling water at 212°F scorches delicate compounds and produces harshness. Water that is too cool under-extracts and leaves you with a thin, sour cup.
A gooseneck kettle with a built-in temperature display solves this without any guesswork. Set it to 200°F as your default, then adjust one degree at a time for darker or lighter roasts.
4. Use a consistent coffee-to-water ratio
Brewing by volume, meaning tablespoons and cups, introduces variability every single time. Bean density changes with roast level. A tablespoon of a light roast weighs more than a tablespoon of a dark roast. That inconsistency adds up across dozens of variables and makes diagnosing flavor problems nearly impossible.
The standard ratio for manual brewing is 1:15 to 1:18 by weight. Start at 1:16, which means 20 grams of coffee to 320 grams of water. This ratio delivers a balanced cup that is neither thin nor overwhelming. From there, adjust to taste.
A basic kitchen scale that reads in one-gram increments is all you need. It costs less than a bag of specialty coffee and will serve you for years. Weighing your dose and your water is what separates consistent home brewing from guesswork.
5. Master the bloom for better extraction
If you brew pour-over or use a manual method with fresh beans, the bloom step is not optional. Fresh beans contain trapped CO2 from the roasting process. If you pour all your water at once, that escaping gas creates uneven channels in the coffee bed, and water rushes through before extracting flavor fully.
The bloom phase involves pouring two to three times the weight of your coffee in water, waiting 30 to 45 seconds, and then continuing your pour. You will see the grounds bubble and expand. That is CO2 leaving, making room for water to contact the coffee evenly. The resulting cup is cleaner, sweeter, and more balanced. Learn more about the blooming process to apply it correctly for your specific beans and roast level.
6. Learn your roast levels and what they demand
Light, medium, and dark roasts are not just flavor preferences. They require different brewing parameters to taste their best. Light roasts retain more of the bean’s origin character, including fruit notes and bright acidity, but they also need slightly hotter water and a finer grind to extract fully. Dark roasts develop roasty, chocolatey compounds during longer roast times but can turn bitter fast if over-extracted.
Matching your technique to your roast level is one of the most underused coffee brewing tips in home brewing. As a starting point:
- Light roast: 203°F to 205°F, slightly finer grind, longer bloom
- Medium roast: 200°F, standard grind, 30-second bloom
- Dark roast: 195°F to 198°F, slightly coarser grind, shorter extraction
7. Compare brewing methods and pick one to master
Every brewing method produces a different cup, not because one is better, but because each extracts coffee differently. Understanding these differences helps you choose the method that fits your flavor goals and lifestyle.
| Brew method | Body | Clarity | Grind size | Learning curve |
|---|---|---|---|---|
| Pour-over | Light to medium | High | Medium fine | Moderate |
| French press | Full, rich | Low | Coarse | Low |
| AeroPress | Variable | Medium to high | Variable | Low to moderate |
| Drip machine | Medium | Medium | Medium | Low |
| Espresso | Very full | Very low | Fine | High |
The AeroPress rewards experimentation. You can brew it inverted, use different steeping times, and adjust grind coarseness freely, making it ideal for anyone who wants to explore artisan coffee techniques without buying expensive equipment.
Pour-over is the best method for tasting the nuance in high-quality beans. The slow, controlled pour amplifies origin characteristics and gives you direct feedback on every variable you adjust. Pick one method, stick with it for a month, and get to know it before adding another.
8. Troubleshoot flavor by changing one variable at a time
If your coffee tastes wrong, resist the urge to change everything at once. Adjusting one variable at a time is the only reliable way to identify what is actually causing the problem. Change the grind, brew again. If that does not fix it, adjust the temperature. If temperature does not resolve it, try the ratio.
Common issues and their most likely causes:
- Sour or sharp: Under-extraction. Try a finer grind or higher water temperature.
- Bitter or harsh: Over-extraction. Try a coarser grind or shorter brew time.
- Flat or hollow: Stale beans or distilled water. Check roast date and water source.
- Thin body: Ratio too low. Increase your coffee dose by two grams and retest.
This systematic approach turns frustration into learning. Every bad cup teaches you something, as long as you changed only one thing since the last brew.
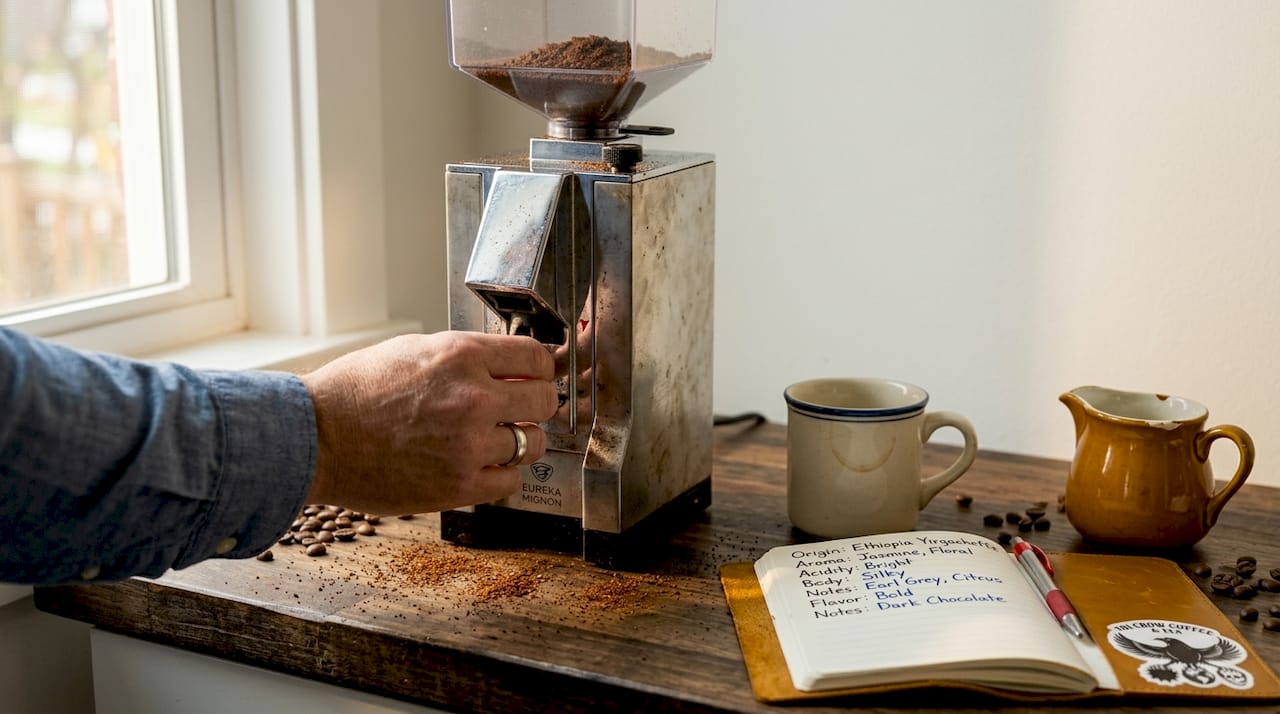
9. Develop your palate with coffee tasting
You cannot improve what you cannot perceive. Tasting coffee intentionally is a skill, and it is learnable. Professional coffee tasters use a protocol called cupping, which involves tasting multiple coffees side by side under identical conditions. You do not need a full cupping setup at home, but you can adopt the mindset.
Slow down your first few sips. Notice the first impression (bright? earthy? fruity?), then the mid-palate (sweetness, body, texture), and finally the finish (how long does the flavor linger? Does it turn dry or bitter?). Writing brief tasting notes creates a reference point that accelerates learning far faster than drinking passively. A coffee tasting guide can help you build a vocabulary for what you are experiencing.
10. Source ethically and understand what you are buying
Where your beans come from matters beyond the cup. Coffee processing methods directly shape flavor, and understanding them helps you predict what a bean will taste like before you buy it. Washed process coffees are clean and bright. Natural process coffees are fruity and complex. Honey process sits in between.
Knowing this vocabulary lets you make better purchasing decisions and builds the kind of intentional relationship with coffee that transforms it from a routine into a practice. Look for roasters who publish their sourcing details, farm relationships, and processing information. That transparency usually signals freshness and care throughout the supply chain.
My honest take on brewing premium coffee at home
I have watched a lot of home brewers spend real money on machines that barely moved the needle, when the actual problem was a $15 bag of stale beans or tap water that smelled faintly of a swimming pool. The order of upgrades matters. Fix your water first. Get a burr grinder second. Then worry about brewers.
What consistently surprises me is how much water consistency matters compared to hitting perfect mineral targets. If you use the same filtered water source every morning, your results stabilize. Chasing perfect TDS numbers with specialty packets is less impactful than simply eliminating chlorine and hardness variation.
The other thing I keep coming back to: patience is the skill. Not patience with the process, but patience with diagnosis. Home brewers who taste carefully, adjust deliberately, and give each change a few brews to prove itself improve dramatically faster than those who chase new gear every few months. Your next great cup is one variable away from the last mediocre one.
— David
Explore premium blends worth brewing right
Learning these techniques only delivers their full payoff when you start with beans worth the effort. Tricrowcoffee crafts every blend in small batches, with roast dates printed clearly so you always know what you are working with. Their Mint Coffee blend brings a clean, cooling complexity that shines in pour-over and AeroPress methods. For something functional and rich, the Coffee with Mushrooms Medium Roast layers earthy depth with adaptogen benefits, and it brews beautifully across drip, French press, and espresso. Both are built for brewers who take what is in their cup seriously.
FAQ
What is the best coffee-to-water ratio for home brewing?
Start at 1:16 by weight, meaning 20 grams of coffee to 320 grams of water. Adjust to 1:15 for a stronger cup or 1:18 for something lighter.
Why does my coffee taste bitter at home?
Bitterness is almost always over-extraction. Try a coarser grind first, then check your water temperature and make sure it is not above 205°F.
Does water quality really affect coffee flavor?
Yes, significantly. Distilled water produces flat coffee, and chlorinated tap water introduces off-flavors. Filtered water with balanced mineral content extracts flavor compounds more cleanly.
Should I buy a burr grinder before upgrading my coffee maker?
Yes. A quality burr grinder delivers more measurable flavor improvement than a new machine, and it costs less. It is the most impactful single upgrade for home brewing.
How fresh do coffee beans need to be?
Beans are at their best within two to three weeks of the roast date. After that, aromatic compounds fade and the cup loses complexity regardless of your brewing technique.